How to – Install R and R studio on Ubuntu

R is the most popular programming language in the field of Big data analysis and data science. Python is also there on the other hand but R has a much bigger library for statistical packages. And also R builds in data analysis functionality by default, whereas Python relies on packages. So the most preferred language for data analysis is R.

So in my today’s blog post am going to demonstrate how you can download R and R studio which is an IDE meant for faster R development on Ubuntu. Below are the steps that you should follow in order to get R and R studio on your machine.

So let’s get started…

Steps :

1. Open the terminal on your machine.

2. Add a key to APT for authentication of packages that we are going to download in some next steps. Enter below command and hit enter.

 sudo apt-key adv –keyserver keyserver.ubuntu.com –recv-keys E084DAB9 

3. Then add the repository URL to APT.

 sudo add-apt-repository 'deb https://ftp.ussg.iu.edu/CRAN/bin/linux/ubuntu xenial/' 

4. Then update the package list.

 sudo apt-get update 

5. Then install r-base package which is the default base package for R programming language.

 sudo apt-get install r-base 

6. Then r-base development package.

 sudo apt-get install r-base-dev 

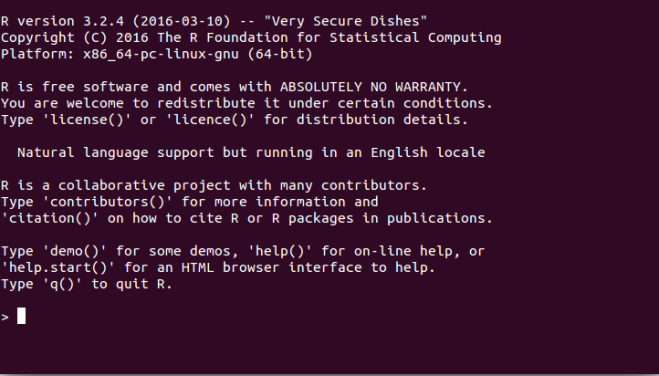
Now at this moment, you have install R on your machine. You can use R by typing R on the terminal and hitting enter. After you do that you will be prompted to R shell on which you can type one by one command and use it.

R on ubuntu.png

In case you want to use R studio which an exclusive IDE for R you have to follow below additional steps.

Steps :

1. Install gdebi core package.

 sudo apt-get install gdebi-core 

2. Then download the latest version of R studio

 wget https://download2.rstudio.org/rstudio-server-1.1.442-amd64.deb 

3. Then install JPEG runtime library

 sudo apt install libjpeg62 

4.  NOTE – If your Ubuntu version is between 16.10 to 17.04 then you have to install some additional packages on your machine. And if your Ubuntu version is above 17.04 then you can proceed to step 8

5. Download the libgstreamer packages and install them.

 wget http://ftp.ca.debian.org/debian/pool/main/g/gstreamer0.10/libgstreamer0.10-0_0.10.36-1.5_amd64.deb
wget http://ftp.ca.debian.org/debian/pool/main/g/gst-plugins-base0.10/libgstreamer-plugins-base0.10-0_0.10.36-2_amd64.deb 

6. Install those packages.

 sudo dpkg -i libgstreamer0.10-0_0.10.36-1.5_amd64.deb
sudo dpkg -i libgstreamer-plugins-base0.10-0_0.10.36-2_amd64.deb 

7. Put those packages on hold so that they won’t get overwritten by the next software update.

 sudo apt-mark hold libgstreamer-plugins-base0.10-0
sudo apt-mark hold libgstreamer0.10 

8. Now its time to install R studio from the package we have downloaded in step 2.

 sudo gdebi rstudio-server-1.1.442-amd64.deb 

And done. You have just installed R studio on your machine. You can access it by searching for ‘ R studio’ application on your machine. It will be there on your machine. If you face any problem while installing R or R studio make sure that you ask in the comment section below.


via

How to – Do C/C++ graphics program in Ubuntu // install libgraph (graphics.h) in Ubuntu. 

In my last post under the category of Ubuntu, I have shown you how you can easily setup Ubuntu as VM (virtual machine) under VirtualBox. And today we are going to talk about installing libgraph (graphics.h) in Ubuntu.

Linux is very popular in the world of developers because it sports some built-in compilers out of the box like popular GCC compiler for C/C++ development. But some of the development tools we have to download via internet like one is if we have to do basic graphics development under Ubuntu then we should install libgraph libraries under Ubuntu which contains graphics.h header file and other important files for development. Basically, libgraph is not the part of the GNU project that’s why it doesn’t come preinstalled with Linux distributions.

But What is Libgraph??

Libgraph is the implementation of the TurboC graphics API on GNU/Linux using SDL. You can get more info here.

You might think that one can easily install libgraph just downloading the files from here. And configuring and installing on Ubuntu machine. But it isn’t simple, Wait. If you read carefully What is a libgraph section in the post you will notice, there is pre-requisite to install libgraph. And that is SDL packages. As libgraph is fully dependent upon SDL, we have to first install them. SDL stands for Simple DirectMedia Layer. Which is the platform on which our graphics program runs? And FYI Ubuntu doesn’t provide this out of the box. So follow the following simple steps to install required SDL version.

Steps to install SDL.

1. Open terminal. (ctrl + shift + T).

2. And copy pastes the following command and hit enter. It will download and update the packages in your system. (it requires internet connection).

 sudo apt-get update 

3. After that execute the following command to install SDL packages. (copy paste following command in terminal)

 sudo apt-get install libsdl-image1.2 libsdl-image1.2-dev guile-1.8 guile-1.8-dev 

This command will install required SDL packages from internet.

Steps to Install libgraph in Ubuntu.
1. After that just download this libgraph installation files from the following link.

Download Libgraph files.

2. Then copy the package to the home directory. And extract it there.

3. Once it extracted open the folder. And right click on empty space and click on ‘Open in terminal’.

4. In terminal execute following command one by one.

 . /configure
sudo make install
sudo cp /usr/local/lib/libgraph.* /usr/lib 

5. And done. You have successfully installed libgraph. To check its installation type man libgraph and it will show up a manual page of libgraph.
And one more thing. You can compile a graphics program by typing following I will terminal.

For C++ program

 g++ .cpp - lgraph 

For C program

 gcc .c - lgraph 

And also don’t forget to replace <program_name> to your actual program name.

If you encountered any problem while doing this, then make sure that you hit comment below about that.

Via

How to – Setup Ubuntu as Virtual Machine on Windows

Programming on Ubuntu has many advantages than on doing it on Windows. Because Ubuntu sports a many programming language compilers out of the box and there is no need to install them additionally. I am not saying Ubuntu is better than Windows but while in some cases it is. And Microsoft knows this and that’s why Microsoft allows you to run Linux bash shell inside in Windows 10 Anniversary update (14393). But today’s post is not about that.
In today’s post, I am going to show you how you can easily set up Ubuntu as guest OS in VirtualBox. But first, a fall What is VirtualBox?
What is VirtualBox?
VirtualBox is the product of Oracle company which allows you to run an entire operating system inside another operating system.
Requirement
To install Ubuntu on VirtualBox you will, of course, need a VirtualBox software. And one more thing Ubuntu ISO file for installation. You can download both of them from following links. And also I will suggest installing VM if you have at least 4 GB of RAM.

Download VirtualBox

Download Ubuntu ISO

Installation Steps

1. Install Oracle VirtualBox software on your system. Double click on setup file you downloaded previously to start the installation. While installing, setup will ask you to install some additional drivers on your system at that time click on install (it’s safe to install).

2. After installation VirtualBox will start automatically. If not, then double click on the shortcut to start it.
3.Then in VirtualBox application click on ‘New’ on left upper corner to set up a new machine.

4. After you click name your Virtual Machine you can name it whatever you want in my case I am simply naming it to ‘Ubuntu’. After you name it to click on next button.
5. On next window, it will ask you how much maximum RAM your virtual machine can use from your actual RAM.

6. This is different for the different user as per their RAM on their machine. It’s recommended to have minimum 2 GB of RAM on your machine to use Virtual Machine. And now a day everyone has at least 4 GB of RAM on their machine so not a problem at all. My suggestion is if you have 4 GB of RAM then give 2 GB (2048 MB) RAM to your virtual machine if you have 8 GB of RAM then you can give (3.5 to 4 GB) RAM to your virtual machine. Note that this is maximum RAM.
7. After your setup RAM for your machine click on next button then click on next, next then create and then finish.

8. After your setup all these things you will see your machine on the list. Right-click on it and click on settings.
9. Then head over to the display tab and configure your settings as per below screenshot.

10. Then now in storage tab click on empty under Controller: IDE and then on the right-hand side in under attributes click on that small disk icon and then click on choose virtual optical disk file.

11. Then now select the ISO file of Operating system that you have downloaded and click OK. In my case, I am using 64 bit of Ubuntu ISO file.

12. Then head over to network tab in settings. In that change Attached to -> bridged adapter. And finally, click on the Ok button of settings tab.

13. And now we are ready to start our virtual machine. Click once on your virtual machine and from the upper menu click on start button. And wait for some seconds to start.

14. After VM started it will ask you to ‘try Ubuntu’ or ‘Install Ubuntu’. Click on install Ubuntu. On next window, setup will ask you to install third-party software check that box and click on continue.

15. Then on installation type window check the first box of ‘Erase disk and install Ubuntu’ and click on continue. Don’t worry it’s not going to wipe out your all HDD. Then click on continue on next small window.

16. On next step type your location and click on continue button. On the keyboard, setup clicks on continue.

17. Then on ‘Who are you’ window type your name, username that you want then enter your password twice and hit on continue. And done. And now installation has been started wait for some time until installation finishes.

18. After installation done it will ask you to restart your machine. On that step click on file menu of VirtualBox (refer screenshot) and then close. And then double click on the power of the machine.

19. And now again head over to the settings of VM and then in storage tab click on Ubuntu ISO file under Controller: IDE and then click on small disk icon at the right-hand side and click on Remove disk from virtual drive. And then OK. And again start your VM.

20. Then enter your password to log in.
After you logged in click on Devices menu in VirtualBox and then click on last option.

21. Then OS will ask you to install software from disk at that time click on Run. Then type the password for authentication. And wait until installation finishes.

22. And then again the power of the machine and restart it and you’re are done.
And now you can do all your stuff on Ubuntu that you want to do.

So this is the full and steps wise guide on how you can easily setup Ubuntu as VM on your machine. If you face any problem doing this, please let me know in the comment section below.