This is a task for building one of the modules in the mentor dashboard: settings.
Main audience: Experienced editors who signed up to mentor on their wikis mentor list.
Figma: M2 mock-ups
Goal/rationale: The main objective of the module is for mentors to have a central place for their tools where they can access them easily. The module is made up of 3 different features:
- Changing the mentor’s status: Changing the mentor status to away has been requested by the community earlier on and has been discussed/worked on under this ticket T227876. Mentors cannot always respond to their mentee’s questions. Currently, if a mentor sets themselves as away or stops mentoring all together nothing happens to their mentees. They stay assigned to their mentor. With this feature, the mentors will be able to indicate how long they will be away for and during that time other mentors will receive the mentee’s questions.
- Editing their mentor message: This is the message that is displayed on the mentee’s newcomer homepage. Currently, to change the message the mentor needs to find the mentor list and alter their message there. By including it in this module it allows the mentor to access and alter their message with more ease.
- Claiming mentee. Claiming a mentee is an existing feature. It allows for mentors to choose mentees and assign themselves as their mentors. This can be handy for teachers working with students. Not all mentors are aware of this feature, so the ‘Settings’ module is a simple solution to give mentors access and display mentor-related tools.
The specifications are written out below.
Copy and links
- Title: “Settings”
- Header: “Mentor status”
- Icon: info icon, when clicked on a popup button widget opens that has a little note about the module and a link to a special page where the mentor can quit mentoring (see "Info icon-pop up widget" for more details) might not be included in this iteration
- Next: Dropdown that has 2 options:
- checkmark icon with “Active”
- history icon with “Pause”
- The default is set to “Active” (unless changed by mentor). (see “Status” for details).
- Header: “Message to your mentees”
- Icon: edit icon (see “Edit message” for details).
- Next: horizontal 4 px width line extending the height of the text.
- Next: “ [message from the mentor]” eg. “Hello! Welcome to Wikipedia. Go ahead & ask me any question that you have.”
- Header: “Other actions”
- Subtitle: Claim mentee
- Next: Button “Claim mentee” (see “Claim mentee” for details)
- Next: “You can change a mentee’s mentor to yourself.”
"Info icon-pop up widget"
- Title: info icon; "Mentoring information"; close icon
- Next: This module contains settings for your mentor status. If however, you wish to quit mentoring permanently, instructions on how to do so are on the following page: How to quit mentoring?
See ticket T288878 for more info
“Status”
- By clicking on the dropdown the mentor can choose one of 2 statuses, which include active or pause (See “active status”, “pause status” for details).
“Active status”
- Active status: the mentor is actively mentoring and responding to their mentee's questions.
“Away status” (includes 2 options)
- General when the status is on "away" it means that the mentor cannot mentor for a limited amount of time. Nothing will change on the mentor’s dashboard, they will still have access to it. Other mentors will receive questions from newcomers when a mentor has set their status to away. There are 2 options, a more complex option, and a simpler one. In option 1 the mentor can choose the number of days they will pause for, while in option 2 they just set their status to away for an undetermined amount of time.
option 1: the complex option
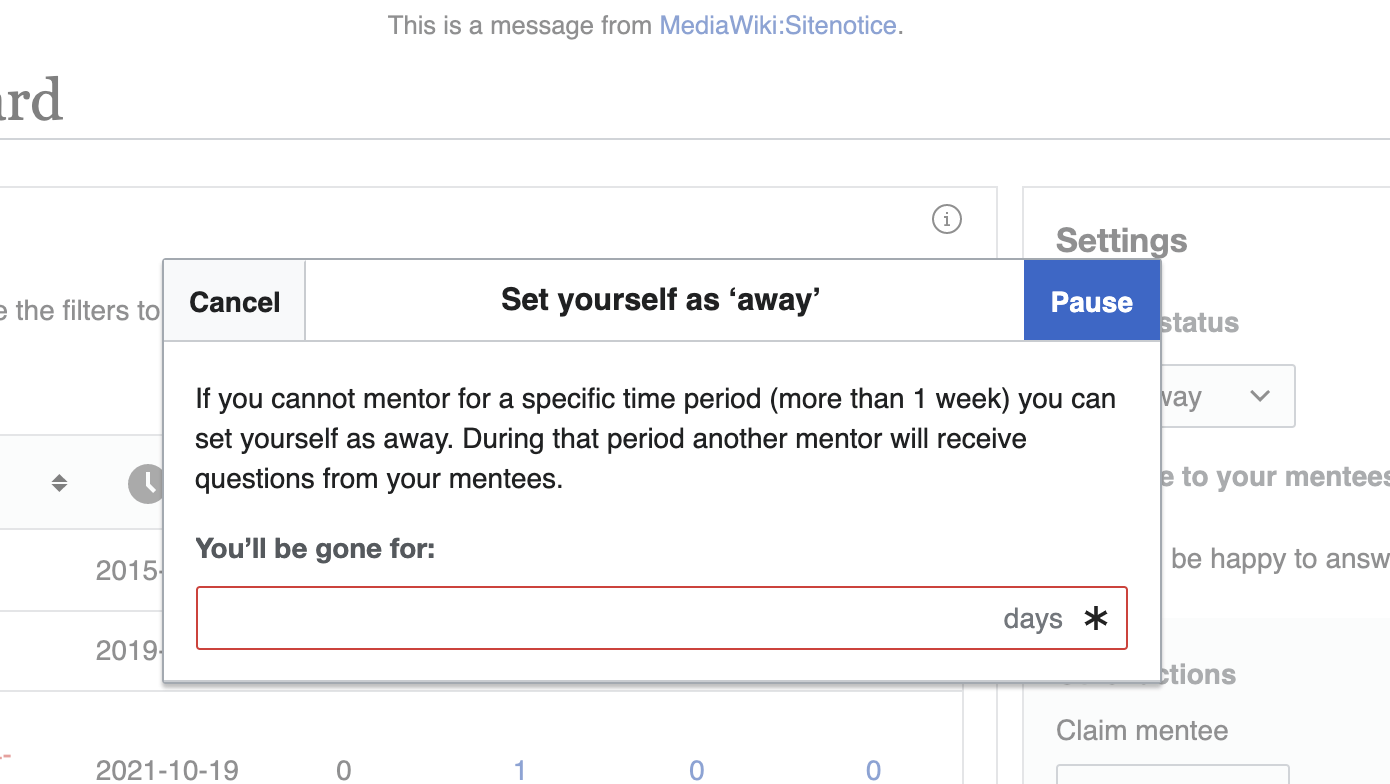
- When the status is selected: a dialogue box will appear (see “pause dialogue 2” for details). In the dialogue box, the mentor can indicate how many days they will be gone for.
- After indicating the number of days they will be gone and selecting the “Pause” button the mentor gets a confirmation dialogue box (see details under “confirm pause”). When the mentor confirms that they want to pause they stop getting new questions. The new questions get redirected to a substitute mentor. All of the mentor’s mentees get notified about this change through their “Your mentor” module on their newcomer homepage. The usual message from their mentor changes to a new message (see “pause message” for details). The message in the mentor dashboard settings module will also change. There the mentor will say:
- “Until the [ date ] your colleagues will receive messages from your mentees.”
“Pause dialogue 1”
- Icon: close icon
- Title: “Change mentor status”
- Button: a disabled button “Pause”
- Header: “Pause mentoring”
- Next: “If you cannot mentor for a specific time period you can set yourself as away. During this period another mentor will receive questions from your mentees.”
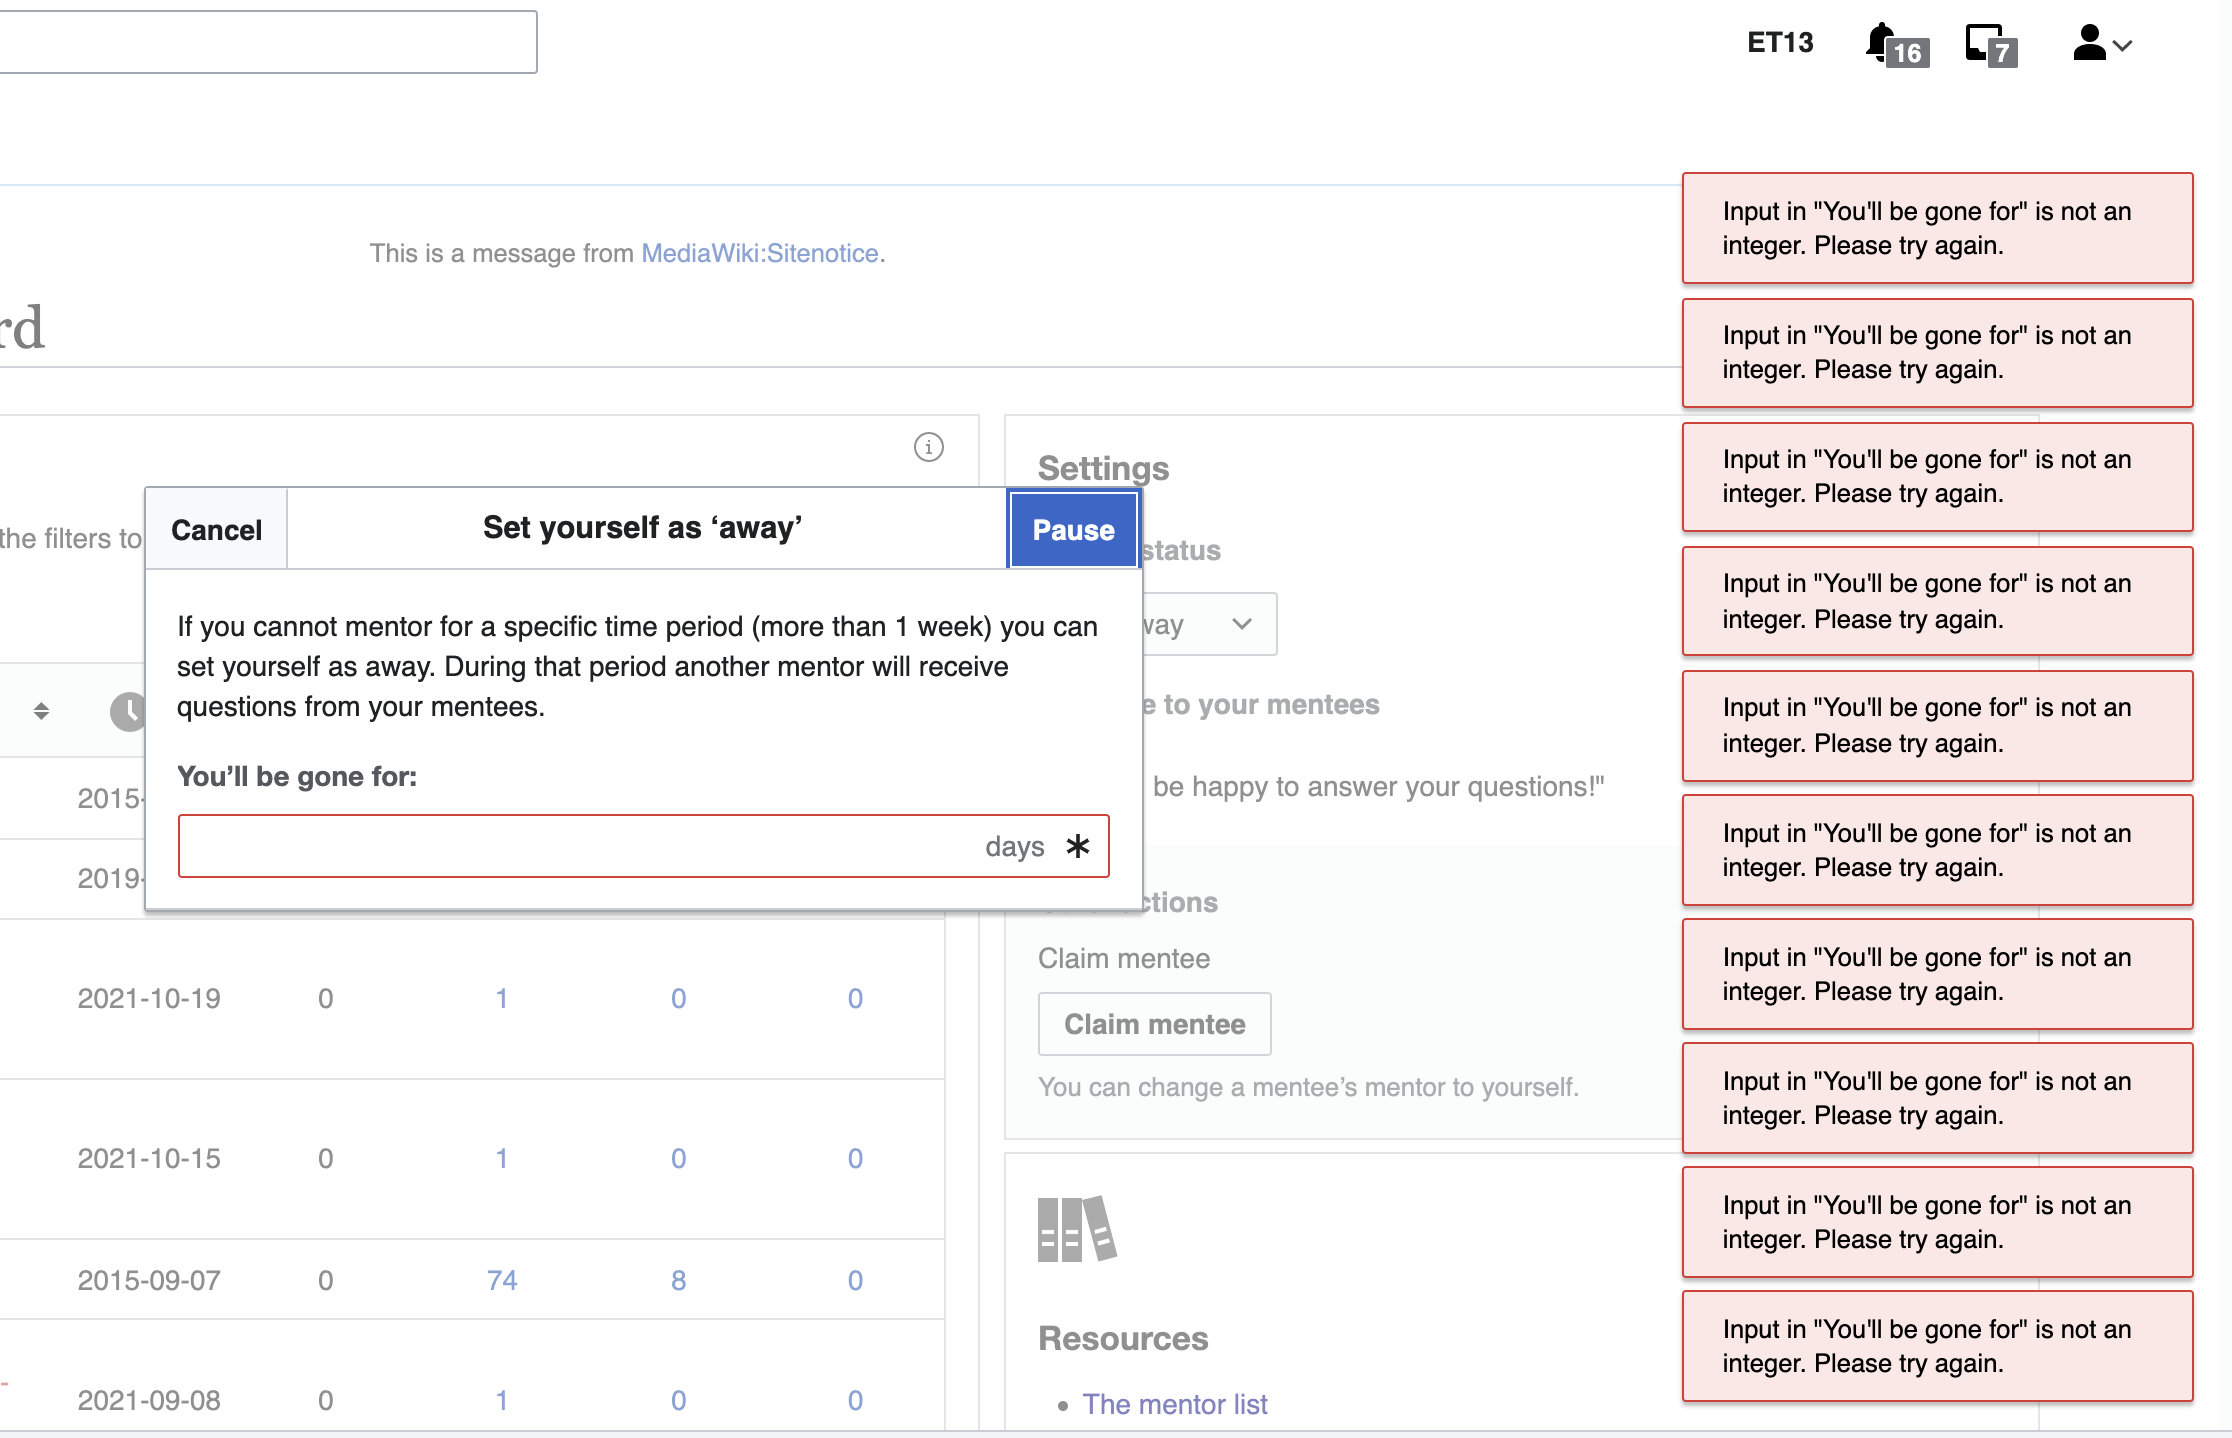
- Next: bold text “You’ll be gone for: [input box] days”. Once a number is typed into the input box the “Pause” button becomes progressive.
- “Confirm pause”
- Text: “You won’t be mentoring for the next [value] days until [date].”
- Next: button “Back”, which will take the mentor back to the previous “dialogue box pause”.
- Next: button “Confirm”, which changes the mentor status to pause.
- “Pause message”
- “You’re mentor [ mentors username ] is away until [ date ]. Until them [ username of new mentor ] will respond to your questions.”
option 2: the simpler option
- When the status is selected: a dialogue box will appear (see “pause dialogue 2” for details). In the dialogue box, the mentor will have to confirm that they want to pause mentoring.
“Pause dialogue 2”
info. will be added
“Edit message”
- Icon: close icon
- Title: “Message to your mentees”
- Next: button “Save” which saves the changes to the dashboard.
- Next: “Your message gets posted publicly to your mentees newcomer homepage under your username.”
- Header: “Your message”
- Text input box: when empty it says “Hi!..” otherwise it includes the mentor’s current message.
option 1: complex option
“Claim mentee”
- Icon: close icon
- Title: “Claim mentee”
- Next: button “Submit”
- Header: “Choose a mentee to mentor”
- Next: “This page allows you to change a mentee’s mentor to yourself. It’s recommended to use this feature for users you know, or for users, you mentor on a course.”
- Header: “Mentee’s username”
- Next: Text input: when empty “Add more...”
- Header: “Reason for claiming this mentee”
- Next: Text input
- After typing in and selecting a mentee(s) the username(s) appear in the text input as input tags. Once a claim has been submitted the mentor receives a quick confirmation message (see “Claim confirm” for details”
“Claim confirm”
- Icon: close icon
- Title: Claim mentee
- Next: “You changed the mentor of user [ user ] to [ mentors username ]
option 2: simpler option
- Choosing the "Claim mentee" button redirects the user to the existing claim mentee page.
Mobile
- There is no difference between desktop and mobile.
Future